1. You need to install SlackEX on an ext4 partition. You must ensure that the current partition is created and formatted before you start the installation. In a Linux system, run the command (for example) mkfs.ext4 /dev /sdaX. You can also use GParted, which is included in SlackEX. In Windows 8.1/10/11, you can create and format your partitions with for example PartitionMagic.
2. In SlackEX all of your hard drive partitions are monted automatically when booting the system. Before you format, you must unmount the current partition. This is done with the command umount /dev/sdaX. ("X" must of course be replaced by the number of your current partition, e.g. /dev/sda6).
3. You must also create a SWAP space of about 2000 MB.
IMPORTANT: Be sure to unmount ALL partitions on your computer before you proceed.
Then follow these steps:
1. So first create a Linux partition of about 35 GB and a swap space of about 2000 MB or twice the size of your computer's RAM (if you have RAM of 1024 MB or less). For that you can use GParted (which is installed in SlackEX). If you use an existing Linux partition, you must make sure it is formatted before running the commands listed below. Hereinafter the Linux partition /dev/sda6 and SWAP partition /dev/sda8. (You must of course enter the correct name for your new or already existing Linux partition and SWAP partition).
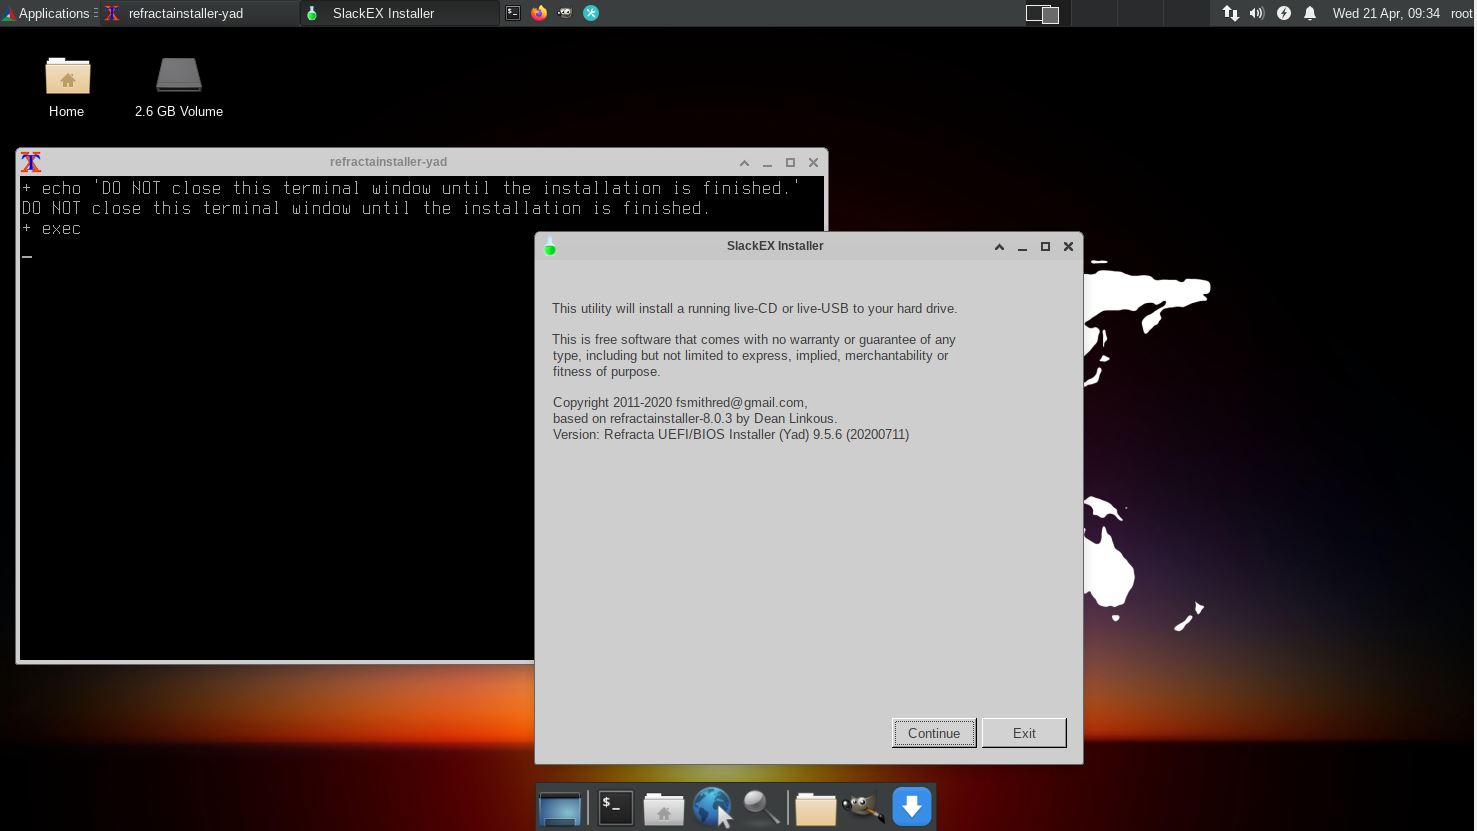
2. Start Refracta Installer from the menu. Watch this screenshot. Then watch the slideshow below showing the whole installation process.

Please note this
If you already have one Linux system installed on your computer and use Grub2 as boot loader you can refrain from installing Grub2 when installing SlackEX. Instead you can just edit /boot/grub/grub.cfg on the partition where you have Grub installed. The boot lines in grub.cfg can look like this (example):
menuentry 'SlackEX 15.0 64bit Refractasnapshot 231129' --class gnu --class gnu-linux --class os $menuentry_id_option 'osprober-gnulinux-simple-0dc1a681-8eb6-40e0-86e7-e89bb1e51f43' {
insmod gzio
insmod part_gpt
insmod ext2
set root='hd0,gpt6'
if [ x$feature_platform_search_hint = xy ]; then
search --no-floppy --fs-uuid --set=root --hint-bios=hd0,gpt6 --hint-efi=hd0,gpt6 --hint-baremetal=ahci0,gpt6 0dc1a681-8eb6-40e0-86e7-e89bb1e51f43
else
search --no-floppy --fs-uuid --set=root 0dc1a681-8eb6-40e0-86e7-e89bb1e51f43
fi
linux /boot/vmlinuz-6.6.1-amd64-exton root=UUID=0dc1a681-8eb6-40e0-86e7-e89bb1e51f43 rw
initrd /boot/initrd.img-6.6.1-amd64-exton
}
NOTE: Be sure that the device name is correct. See above. Maybe it is /dev/sdb6 instead of /dev/sda6 or...
HOW TO chroot
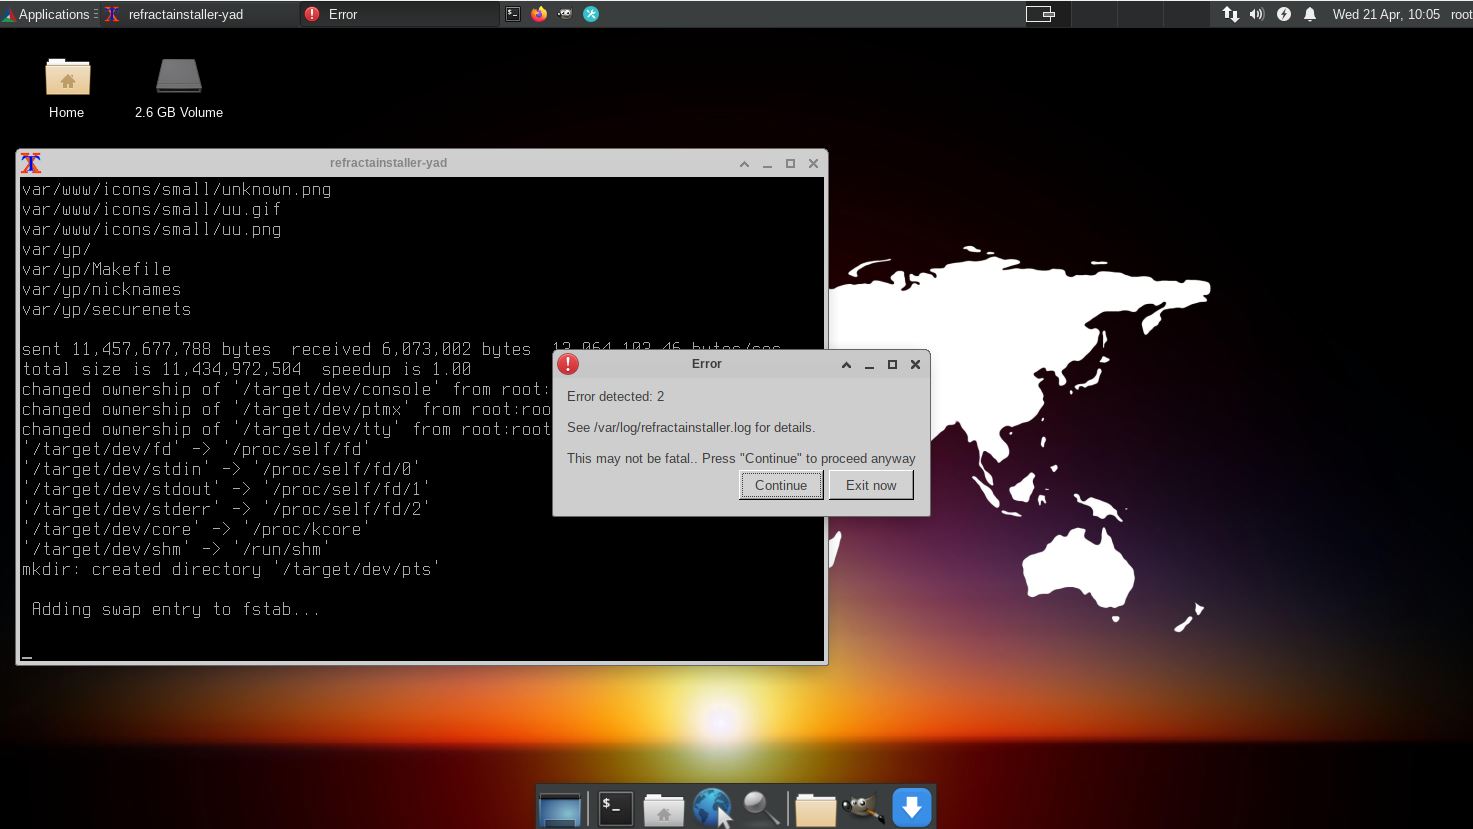
As you can see from the slideshow above the installation will end with an error message. That's because Refracta Installer is made for Debian systems and SlackEX is a Slackware system. However, when the error message shows up the installation is ready except for the boot loader installation. So if you don't need Grub you can just close Refracta Installer and configure your boot loader elsewhere. If you need Grub to be able to start SlackEX you'll have to chroot into the install partition and manually install Grub. Close down Refracta Installer and run the following commands. (The example below is for when installing SlackEX in VirtualBox/VMware).
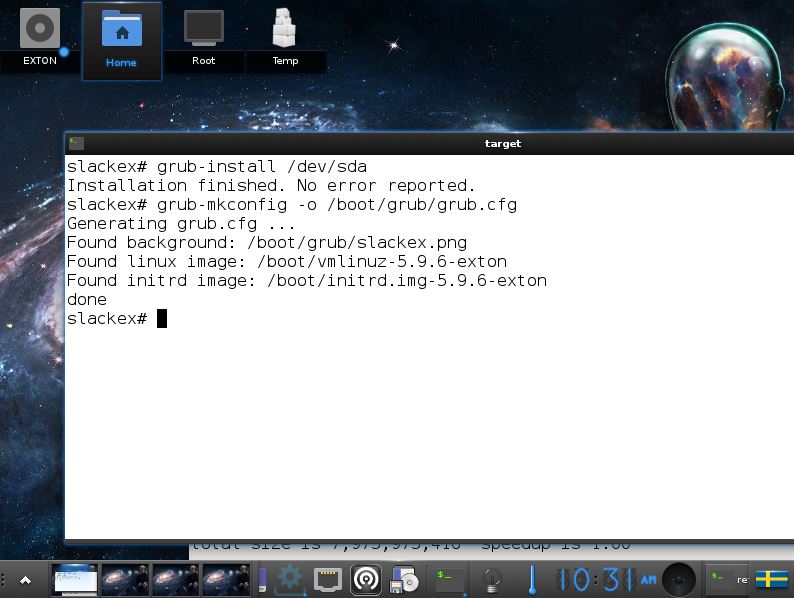
When the installation is ready open up a terminal and run the following commands (as root):
1) slack# mkdir /mnt/sda1
2) slack# mount /dev/sda1 /mnt/sda1
3) slack# mount -t proc proc /mnt/sda1/proc
4) slack# mount -o bind /sys /mnt/sda1/sys
5) slack# mount --bind /dev /mnt/sda1/dev
6) slack# chroot /mnt/sda1 /bin/bash
7) slack# grub-install /dev/sda
8) slack# grub-mkconfig -o /boot/grub/grub.cfg
NOTE 1: The above chroot example is for installations in VirtualBox/VMware.
You shall of course change /dev/sda1 to for example /dev/sda6 if you are
installing SlackEX in another way. (Another computer).
NOTE 2: You can also choose to chroot directly from within Refracta Installer. If you do that you shall (of
course) only run command 7) and 8). Watch this screenshot.
NOTE 3: The above chroot example is for installations in VirtualBox/VMware as I just said. You shall of course change /dev/sda1 to for example /dev/sda6 if you are installing SlackEX in another way. (Another computer).
Installing SlackEX on UEFI computers
If you need Grub to be able to start SlackEX from hard drive you could benefit from reading my INSTRUCTION
How-to dual-boot, triple-boot or multi-boot Linux with Windows in a simple way and be happy…
Configuring X
When you run SlackEX from an USB stick X will be autoconfigured
(unless you have a very unusual video card and/or other unusual
hardware). After installing SlackEX to hard drive, you may need to
configure X using the command X -configure.
exton /231129
BACK